With the calculation programme integrated in the Styro Stone website, you are able to introduce the corresponding data of your project and automatically obtain a list of the necessary elements including the price.
To understand how to use the calculation programme, we will demonstrate via an example project of a standard family home, explaining all the possibilities available on the programme.
First you need a ground floor plan with all exterior walls numbered and their respective window and door openings shown in each wall.
All data introduced can later be modified, however to save unnecessary work it is advised to draw up the plans first and introduce all the correct data.
Online help
Online help is available. Position the mouse(without clicking) over the top of any of the calculation programme fields and the help window will appear to assist you with the correct choice or option available to suite your project.
![[IMAGE]](/images/tutorialen00.jpg)
Recomended modulation
It is possible to build to any length of wall measurement however the blocks are made in increments of 50 mm.
The length of the standard block is of 1metre and they are marked with notches every 50 mm. The exterior of the corner blocks measures 50cm and the interior 75cm.
In spite of being able to cut down the blocks every 5cm we strongly recommend that the modulation be carried out in 250 mm increments.
If you build a wall of 8.95 metres, you will have to cut down one block in each course built by 5 cm wasting the time implicated in cutting and 5cm of block. If the height of the wall is 2.75 metres that would represent eleven cuts and a waste of 5x11=55 cm of material.
The best way to avoid the above is to modulate to 250 mm. If the wall is 8.14 metres it would be better to readjust it to 8 metres or 8.25 metres.
We presume that if you thought of 1,20 m for the size of the windows you would not mind increasing it to 1.25 metres. The dimension of the openings made for the windows would be 1.25 metres but when ordering, the actual windows themselves they would be ordered with one centre meter less on each side so they can then be fixed in with foam to the styro Stone structure. (Prior to this they can also be fixed with screws through the polystyrene structure into the concrete).
Calculation example
The plan below is of a standard home which consists of a loadbearing perimeter wall and an interior loadbearing wall.
The second floor of the plan incorporates a pitched roof. Two of the exterior walls have gables with a pitch of 30 degrees.
The floor structure will be supported by the exterior walls and also by the interior loadbearing wall distributing the weight.
![[IMAGE]](/images/tutorialen01.jpg)
First, number the walls starting from the left wall and proceeding clockwise.
The second drawing shows the height of wall number one where we can see the gable and the openings for the windows.
![[IMAGE]](/images/tutorialen02.jpg)
The following blocks are available with Styrostone, some of them we will use for our construction:
| Type of Block | |||
| Standard | |||
| Half Height | |||
| Lintel | |||
| Floor/Ceiling edge | |||
| Corner Stone L (left) | |||
| Corner Stone R (right) | |||
| Corner Stone 45º L (left) | |||
| Corner Stone 45º R (right) | |||
| End Closures |
The first 4 lines consist of standard blocks and corner blocks. Where openings are left for window and door End Closures are used.
In the following courses with openings for windows and doors End Closures are also used.
The last courses of blocksc where doors and windows are positioned, are built with the Half Height blocks and Lintel blocks (overlapping by 10 and 15 cm each side) and the rest will be completed with standard blocks and the final row will be of Floor/Ceiling edge blocks.
For the loadbearing interior walls a half Height block will be added at 2.75metre (12.5 cm) to achieve height.
Any combination of block is possible to make other size openings for windows and doors.
![[IMAGE]](/images/tutorialen03.jpg)
Next we open up the calculation programme introducing our user name and password. If you are not registered yet do so first and then all your calculations will be saved on our server. To carry out any calculation does not oblige you to anything.
![[IMAGE]](/images/tutorialen04.jpg)
To start a new calculation, select Project and New Project.
![[IMAGE]](/images/tutorialen05.jpg)
Give your Project a name.
![[IMAGE]](/images/tutorialen06.jpg)
Our example project consist of 9 walls ( Styrostone walls not interior walls). We will use the Neopor Standard stone with hard ties (later we will see the different types of blocks and their uses). Being a ground floor house without basement we introduce “1” in the number of floors. The height from floor to interior ceiling is 2.75 metres to which later we will add 12.5 cm because it will be finished with a ceiling edge block. Now we introduce the following data:
![[IMAGE]](/images/tutorialen07.jpg)
Now in the next screen we can introduce the data into the template for each wall:
![[IMAGE]](/images/tutorialen08.jpg)
Wall number one according to our plan is 8 metres long and a predefined height of 2.75 m, one gable has a 15º degree incline and on this wall will rest the trusses. The wall starts and finishes with a corner. As the wall has two window openings we press the '0' button of the column 'doors and windows' to introduce the number we want. In the 'Observations' we can introduce any note which will help us later on.
Wall nº 1 has two window openings of 1.50 x 1.375 metres. Since each are window openings the type of lintel will be made with the lintel block and half height block. Each one has a height of 12.5 cm which add up to 25 cm equivalent to the height of the standard block. Introduce 1.5 m for the width and 1.375 for the height. Press 'Insert opening' and insert the data for the second window opening. Press “Send” to close this screen and send the data. On the first screen we can see the spaces for wall nº 1 and on the second the spaces for wall nº 4 ( with one exterior door and one window):
![[IMAGE]](/images/tutorialen09.jpg)
![[IMAGE]](/images/tutorialen10.jpg)
Once all the data for the ground floor is introduced our template will look like the following:
![[IMAGE]](/images/tutorialen11.jpg)
Wall number 9 being an interior wall will have to be finished with a half height block for it to reach the floorheight. This wall not being an exterior wall and not needing so much thermal insulation can be built with Styropor (PSE) blocks. As this wall does not connect with another wall its finish will be of type '1' at each end or which is the same as using end closures like we use for the window and door opening.
If we want to add another wall because we omited one at the beginning or we have modified our plan we can press 'Insert Wall' to add it. Once the ground floor is finished we can press the 'Calculate' button if the project is finished, if not press 'Insert floor', if we want to add another floor and 'Copy floor' if the added floor is the same as the ground floor. For our example we will press 'Copy floor'.
In our example though we will not copy the same openings because we are not putting the same windows in on the first as on the ground floor because it is going to be the attic but if it was an apartment block we would repeat the same openings on each floor. We copy floor '1' from wall '1' to wall '8'. Wall '9' we are not going to copy to the attic. The height in the whole of the attic is 1 metre except the gable en walls.
![[IMAGE]](/images/tutorialen12.jpg)
The walls for the first floor should look like the following in the template:
![[IMAGE]](/images/tutorialen13.jpg)
We only have to modify walls '1' and '5' adding the gable and the window openings. Introducing data in the field 'gable' the window shown below will appear. If we press “accept” the wall will remain at 1 metre and on this the blocks will be added to form the gable with the degree of pitch which we have defined. If we press “cancel” from the 1 metre wall we would cut the existing blocks to form the gable. We press 'accept'.
![[IMAGE]](/images/tutorialen14.jpg)
When we have introduced all the data press “calculate” accept and in a few seconds you will obtain the price for your project.
The calculation will show the list of materials necessary and an extra calculation for the concrete needed. For the price of your project to be more exact consult your local area for the price of concrete and also for the pumping.
![[IMAGE]](/images/tutorialen15.jpg)
Annex
In this section you can consult the different options the programme has and then select the correct blocks:
| LAST ROW | |
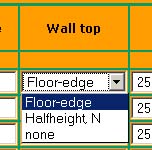
| The ground floor of our project has 11 rows of blocks which reach a total height of 2.75 metres. From there we have 3 options for the finish of the upper part of the wall: | |
 | |
| TYPES OF BLOCKS | |
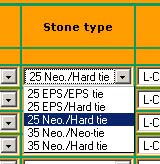
| There are 5 different types of standard block. Select the appropriate block for each application: | |
 | |
| WALL FINISH | |
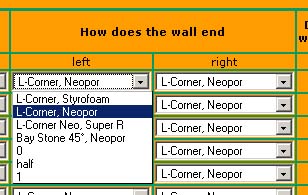
| Each wall finishes at each end a different way. It could be finished with end closures or connecting to another wall making a defined angle: | |
 | |
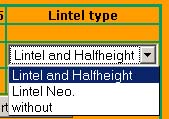
| TYPES OF LINTEL FOR DOOR AND WINDOW OPENINGS | |
 | |
We hope that with this tutorial you have enough information for the calculation of your project. although if you do need more information or to consult us with anything please do not hesitate to contact us.
continue to 비용 및 배달 - 어 - 값 계산